Twitch Emote Resizer
Get the perfect emote size for your Twitch chat.
Convert your existing emotes and animated gifs to the correct sizes before uploading using our tool.

Upload Emotes
Twitch Emotes
Emote Upload Requirements
To successfully resize your emotes for Twitch, your source image needs to meet a few requirements.
The image must be a square, and the file size must be less than 20mb.
If parts of your emotes are transparent, then the file will also need to be a PNG file to preserve these transparency values.
Type: Twitch Emotes
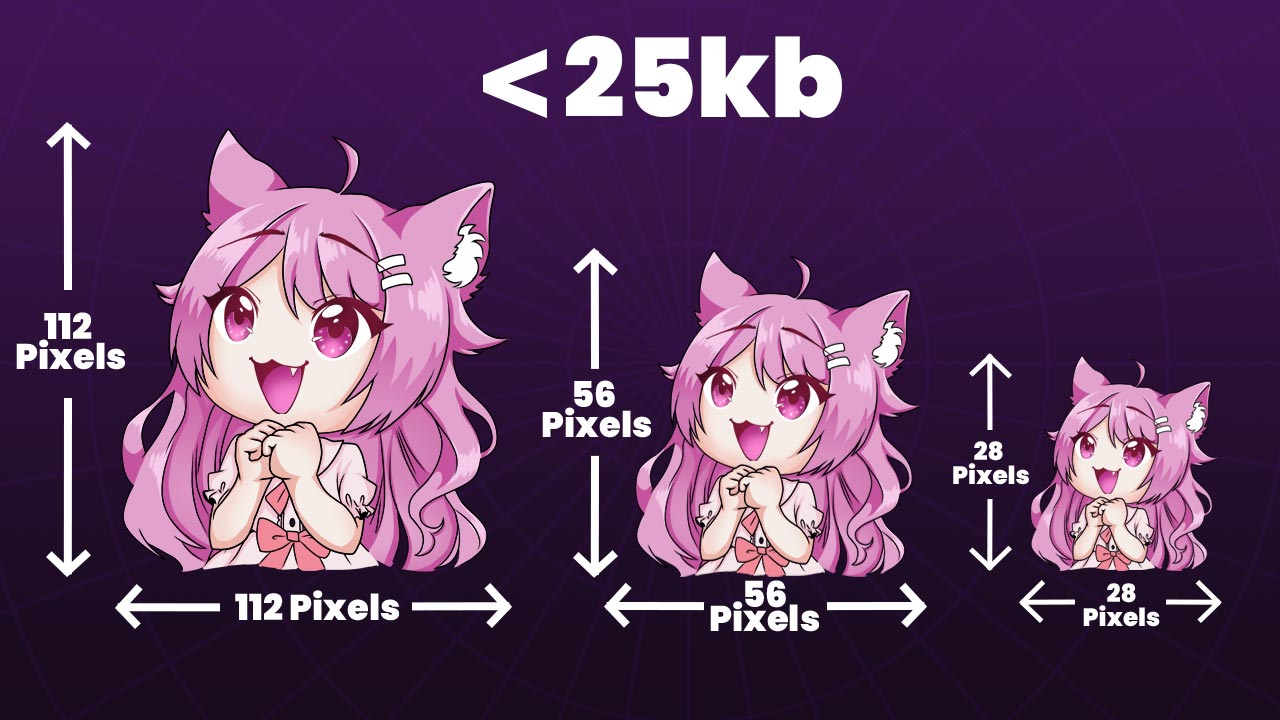
Dimensions: 112x112, 56x56, 28x28
File Size: 25kb
File Type: PNG/GIF
Uploading Twitch Emotes
- Log in to your Twitch account and go to the Creator Dashboard
- In the Creator Dashboard, select "Viewer Rewards" > "Emotes"
- Click "Upload Emote" in the appropriate tier or category
- Upload the emote files in three sizes (112x112, 56x56, 28x28) and name them with a unique emote code
- Review your emote and click "Submit for Review"

Why Emotes Need Resizing
Depending on the platform you're uploading to emotes must meet certain width and height dimensions, usually measured in pixels. By resizing the emotes you remove any upload issues that you might encounter
Another reason for resizing is that most platforms put a size limit on the images that you upload. By resizing the emotes to the appropriate dimensions you can ensure that your emotes are accepted by the platform
Check Out Our Other Free Streaming Tools
Bitrate Calculator for Streaming - Twitch, YouTube, Facebook
Find the optimal bitrate for your stream based on resolution, motion complexity, and upload speed. Prevent buffering and lag with the right settings.
Twitch Badge Resizer
Resize your Twitch badges using our resizer tool. Download your resized badges in the correct dimensions
Twitch Panel Resizer
Resize your Twitch panels with this free tool. Download your resized panel the correct dimensions
Twitch Banner Resizer
Resize your Twitch banners with this free tool. Download your resized banner the correct dimensions
Twitch Sub Calculator
Calculate the exact value of your Twitch subscriptions across all tiers (Tier 1, Tier 2, Tier 3, and Prime) and determine how much revenue you keep based on your Twitch partnership level (Partner or Affiliate).
Twitch Stream Title Generator
Create the best stream titles to catch the audiences attention.

